Sharpening like RegiStax
RegiStax is a trademark of its owner; Helia is not affiliated with it. See Credits, licences and trademarks.
This recipe takes a real H-alpha capture, stacks it, and sharpens it with the wavelet settings a RegiStax 6 tutorial would use, then shows what each choice does and what to do if the result is soft, grainy or ringed. It uses the RegiStax-style controls of the Sharpen step; if you are new to Helia's Sharpen step, read 6. Sharpen first, and if you want the control-by-control mapping, Coming from RegiStax.
The capture. 15_32_09.avi: H-alpha, a colour camera, 720 x 540, 1,000
frames, full disc. Helia chose the filter from the file name, kept the best 25%
(250 frames) and stacked the plane that carries the signal (the red plane of this
camera is clipped, so Helia stacks the next one). Any capture of any filter works;
solar H-alpha and Ca K are the ones measured here.
What you will get
A stack that looks soft becomes visibly crisp, on the same stack:
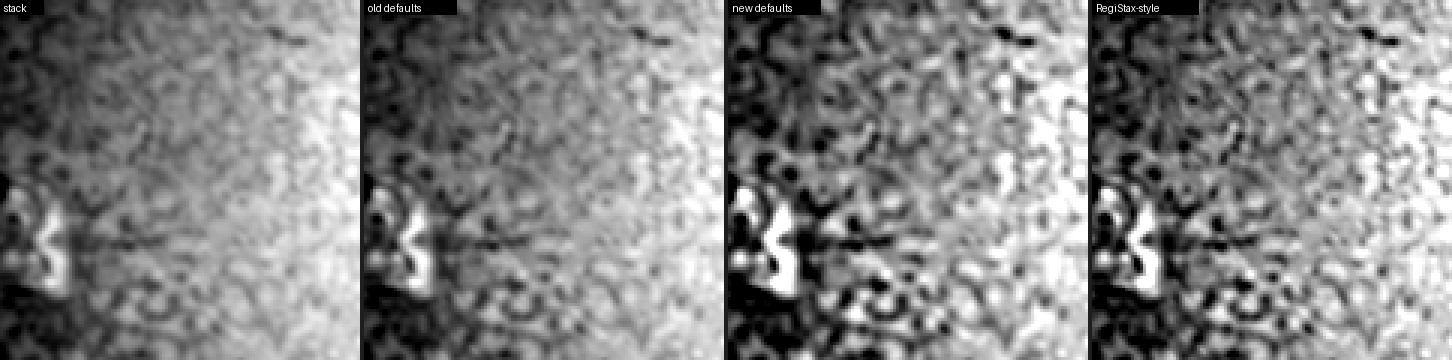
Over the disc-centre crop (helia measure), as the band-pass contrast, in per cent
of the mean:
| pixel scale (noise) | 1 to 4 px (fibrils, mottling) | 4 to 12 px | |
|---|---|---|---|
| Stack | 0.30 | 0.96 | 0.79 |
| Old recommended wavelets (gains 1.5, 1.45, 1.25) | 0.40 | 1.22 | 0.92 |
| New recommended wavelets | 0.62 | 2.17 | 1.62 |
| This recipe (RegiStax-style) | 0.72 | 2.05 | 1.23 |
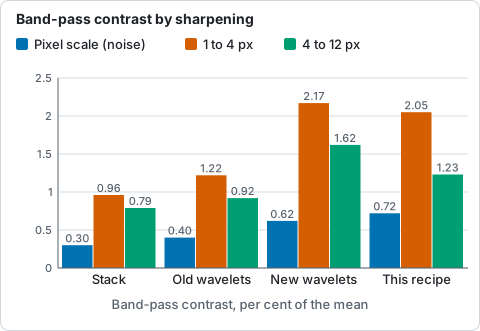
Band-pass contrast of the disc centre in three bands for the stack and three wavelet settings, from helia measure.
The old defaults raised the 1 to 4 px band by a quarter, which is why a picture
looked soft. The recipe doubles it, and the noise (pixel-scale band) rises less
than the detail does. Noisier captures behave the same way: on the 2022
15_20_57.ser capture (a noisy H-alpha stack) the 1 to 4 px band goes from 2.02
to 4.97 against a noise rise from 1.56 to 4.44, which is why that capture needs
more denoise (see Troubleshooting).
Step by step, in the app
- Open and stack. Press Open capture, choose the file, press Stack with the defaults. The result takes a few seconds on a GPU.
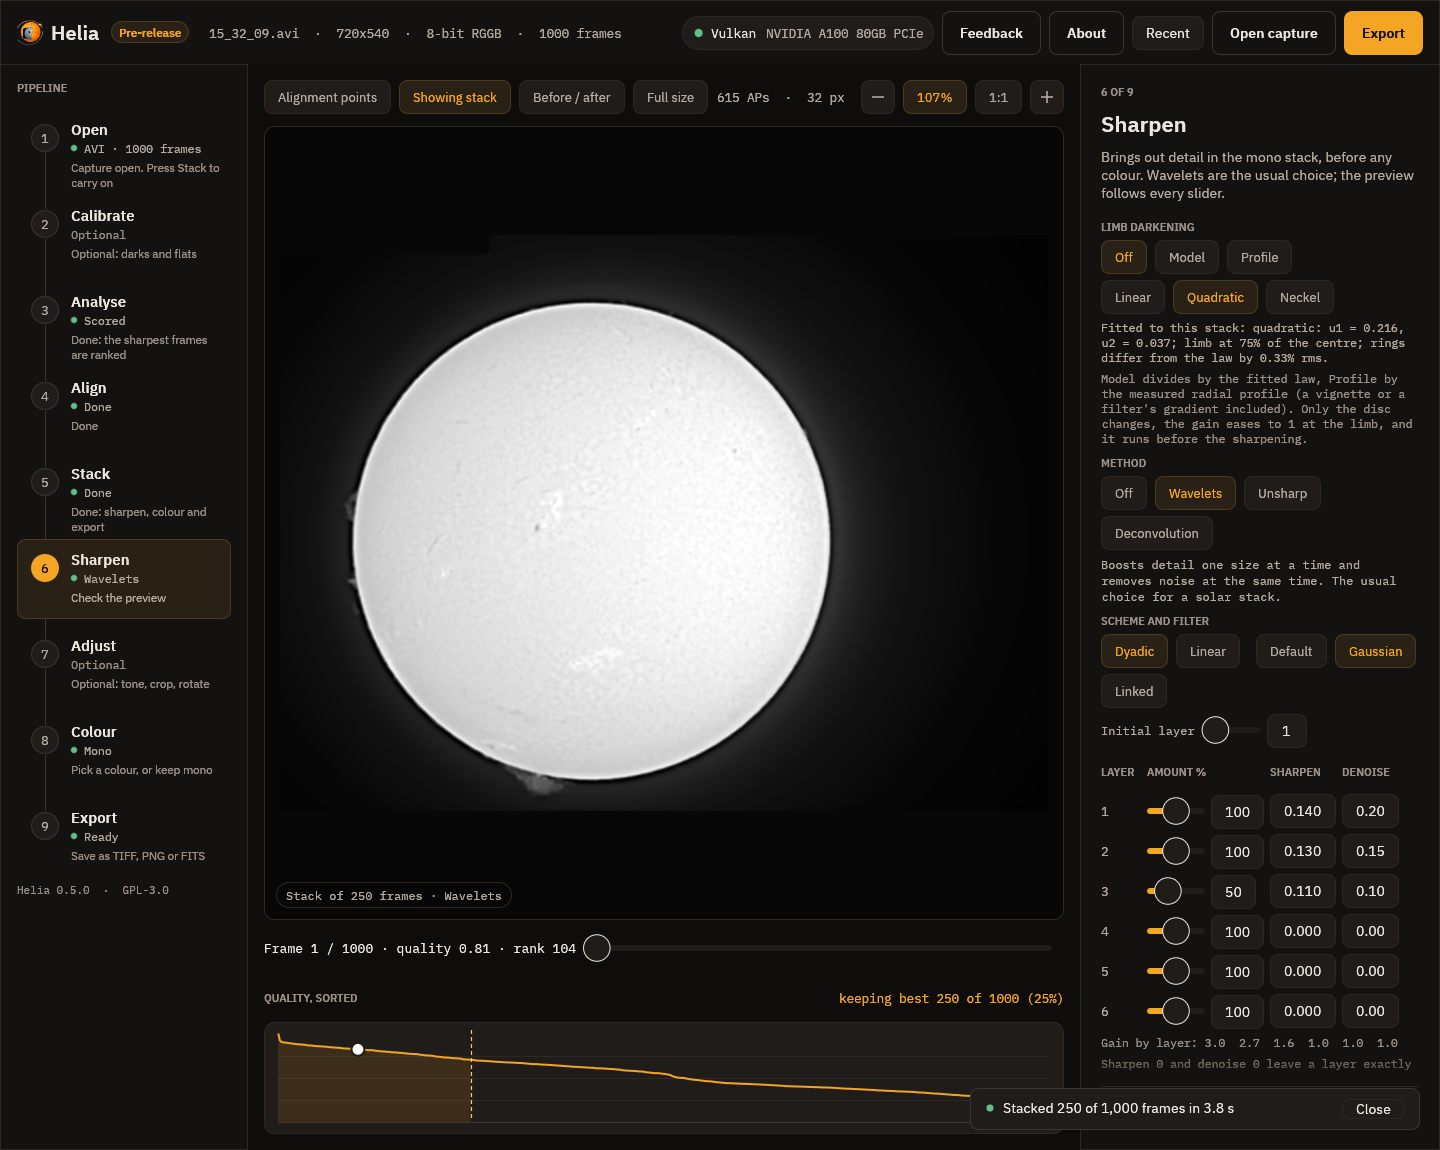
- Go to Sharpen (step 6). Wavelets is already selected, with the recommended values of the filter. Press Before / after and 1:1 in the toolbar so you judge at 100% with the stack on the left.
- Scheme and filter. Choose Dyadic and Gaussian. Leave Initial layer at 1 and Linked off. (RegiStax tutorials for the Moon and planets use these too.)
- Layer 2 first. Set Amount 100, Sharpen 0.13, Denoise 0.15. Layer 2 holds the fibrils and the mottling, and is where the picture gains most.
- Layer 1. Set Amount 100, Sharpen 0.14, Denoise 0.20. Layer 1 carries the pixel noise, so give it more denoise than the others. If you see grain, raise the denoise before you lower the sharpen.
- Layer 3. Set Amount 50, Sharpen 0.11, Denoise 0.10. This is the broader texture; half the amount is plenty.
- Leave layers 4 to 6 alone (Sharpen 0). Raising them adds a halo and a washed look on a disc.
- Look at the Gain by layer line: it should read about 3.0, 2.7 and 1.6 for layers 1 to 3. That is a firm, not an extreme, boost.
- Save the settings. Type a name under My presets (for example "Ha like RegiStax") and press Save. Press the name to use them again, on any capture.
The same settings on the command line, from the capture or from a stack you already have:
helia stack 15_32_09.avi -o ha.tif --preset ha \
  --wavelets registax:l1=100/0.14/0.2,l2=100/0.13/0.15,l3=50/0.11/0.1,filter=gaussian
helia edit stack.fits -o ha.tif --preset ha \
  --wavelets registax:l1=100/0.14/0.2,l2=100/0.13/0.15,l3=50/0.11/0.1,filter=gaussian
or in the API, in the job's config:
"wavelets": "registax:l1=100/0.14/0.2,l2=100/0.13/0.15,l3=50/0.11/0.1,filter=gaussian".
How the settings translate
| In RegiStax 6 | In Helia | Gain at the settings |
|---|---|---|
| Dyadic, Gaussian | Dyadic, Gaussian | |
| Layer 2: slider 100%, sharpen 0.130, denoise 0.15 | l2=100/0.13/0.15 |
2.7 |
| Layer 1: slider 100%, sharpen 0.140, denoise 0.20 | l1=100/0.14/0.2 |
3.0 |
| Layer 3: slider 50%, sharpen 0.110, denoise 0.10 | l3=50/0.11/0.1 |
1.6 |
These are the values of the SharpCap guide's Jupiter example (see the sources), used here on the Sun.
Going further: gains of 10x and more
A very soft stack, or a high-resolution capture of a fine feature, sometimes needs
more. The range is there: at an amount of 100%, a sharpen of 0.5 is a gain of 26,
and 1 is a gain of 101, and an amount up to 200 doubles the reach. Do it one layer
at a time, with denoise to match. On this stack the settings
l1=100/0.6/0.4,l2=100/0.5/0.3,l3=100/0.3/0.15 push the 1 to 4 px band to 20% of
the mean, which is far past what the Sun shows: noise has become detail. The
useful range on a real solar stack is a gain of 2 to 8 on layers 1 to 3; the high
end of the range is for stacks of fine, bright structure, and for experiments.
Linear scheme
A linear scheme with step 0 keeps every layer at the same size: successive layers then catch successively larger detail only because each smooths the last. RegiStax users like it for control over the middle sizes. In Helia choose Linear, Initial layer 1 and Step 0, and set, for example:
registax:l1=100/0.20/0.15,l2=100/0.15/0.15,l3=100/0.13/0.10,l4=100/0.11/0.10,scheme=linear,initial=1,step=0,filter=gaussian
On the same stack that gives 1.00, 2.41 and 1.14 (pixel scale, 1 to 4 px, 4 to 12 px, per cent): a little more of the fine detail than the dyadic recipe and a little less of the larger sizes (1.14 against 1.23).
Troubleshooting
- The picture is still soft. Press 1:1 and Before / after first: at fit zoom a sharper picture looks softer than it is. Then raise the sharpen of layer 2 by 0.02 at a time. If layer 1 is doing nothing, set Initial layer to 1 (not 2).
- Grain or a "salt and pepper" look. The noise of layer 1 is being boosted. Raise its Denoise (0.25, 0.30) before you lower the Sharpen. A noisy capture needs a higher denoise: the noisy 2022 capture above has about five times the pixel noise of this one.
- Dark rings or bright halos at the limb or round a sunspot. The boost is too high for the contrast there. Use Model limb darkening in the same step (it flattens the disc before the layers see it), lower the sharpen of layers 1 and 2, or use a lower Amount for the layer.
- A flat, washed look. Layers 4 to 6 are boosted. Set their sharpen back to 0.
- Sharper in the app than in the file. The preview while you drag is made from a shrunk copy; let go and wait for it to be made again at full size, or switch on Full size. The file is always from the full-size stack.
- Sharper in RegiStax for the same numbers. The numbers carry over approximately (see the page on what can and cannot be matched). Raise the sharpen a little, or the amount above 100.
error: wavelets: .... The text of--waveletsisregistax:thenkey=valueitems separated by commas:l1=AMOUNT/SHARPEN/DENOISE,scheme,filter,initial,step,linked. A layer needs at least the amount and the sharpen.
On a faint line: Ca K
Calcium K is faint and noisy, so it takes a harder noise cut and a gentler boost. The new Ca K defaults (gains 1.7, 2.8, 2.0, 1.4; noise cuts 3.0, 1.5, 0.8, 0.2) raise the 1 to 4 px band from 0.088% to 0.104% of the mean (the plain stack to the sharpened one) where the old defaults lowered it to 0.064%, and keep the pixel noise at 0.048% against the stack's 0.115%:
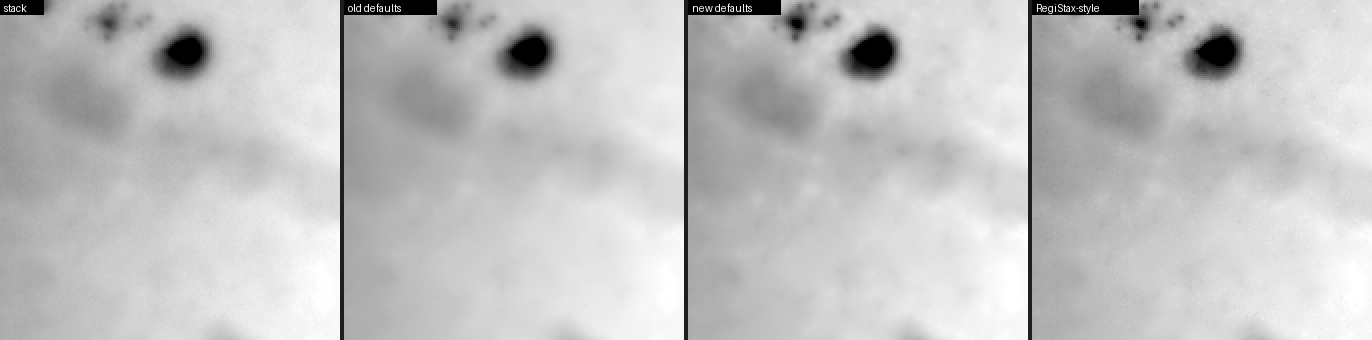
Take the same RegiStax-style settings on this capture and the pixel-scale noise comes back to the level of the stack (0.117% against 0.115%); a faint line wants a harder denoise than a bright one.
What was measured
Everything on this page is from helia measure on stacks made from the owner's
captures (15_32_09.avi, 15_37_19.avi, 15_44_48.avi) and the 2022 set
(15_20_57.ser), 25% of the frames kept, at the settings shown. The bands are the
band-pass contrast in the disc-centre crop; compare only like with like. The
captures and the numbers are checked in the real-data tests of the repository.