The desktop app
valerian-gui does everything the command line does in one window, with the same
five steps in the same order: Calibrate, Register, Stack, Process, Export. It is
laid out like Helia's, in Valerian's own colours: a night sky, and an optional red
night-vision palette for use at the telescope.
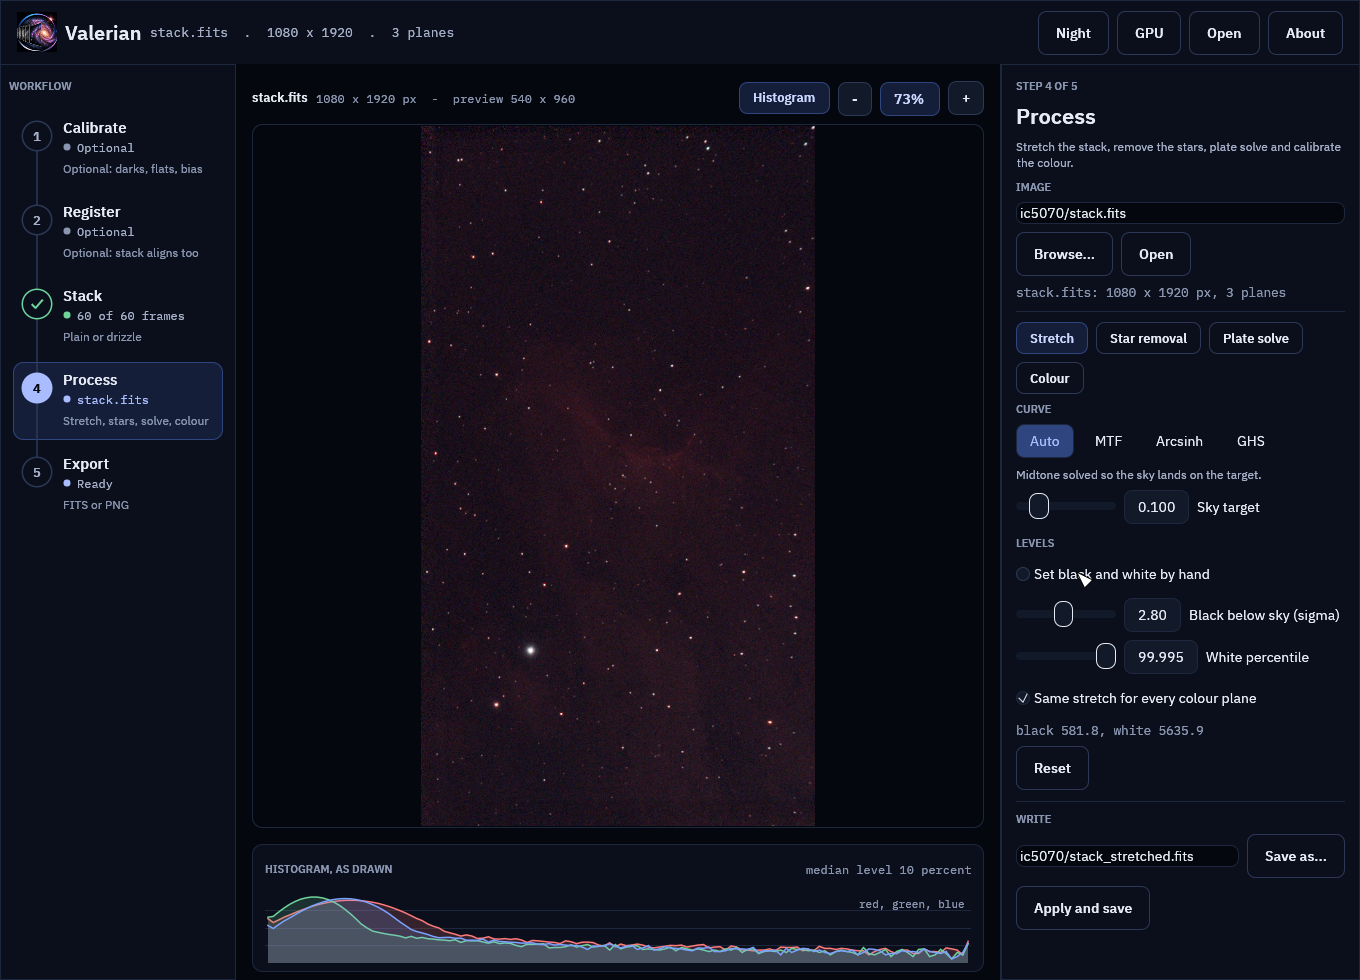
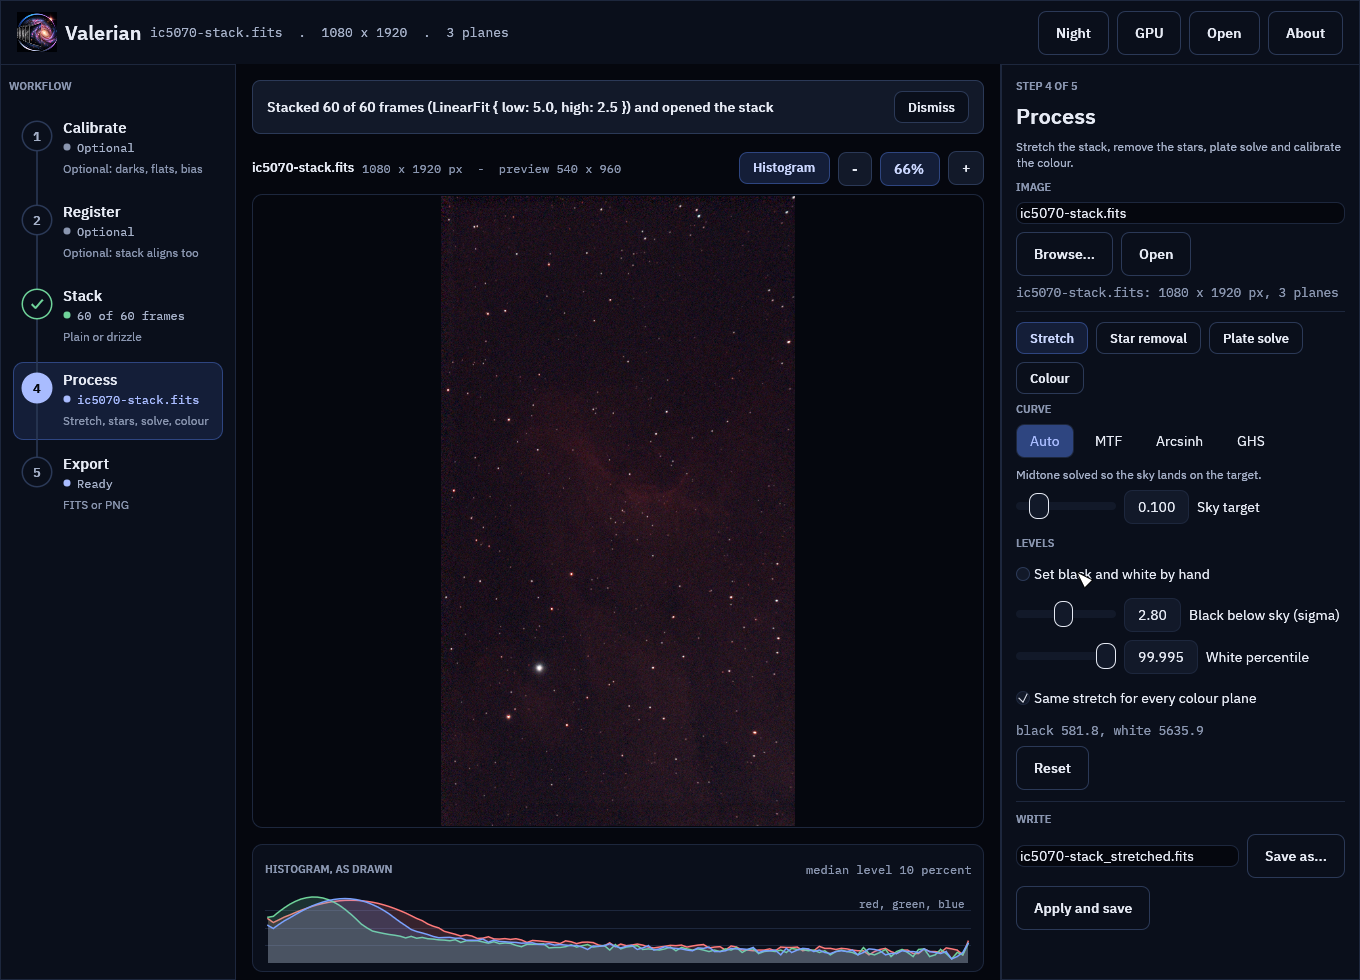
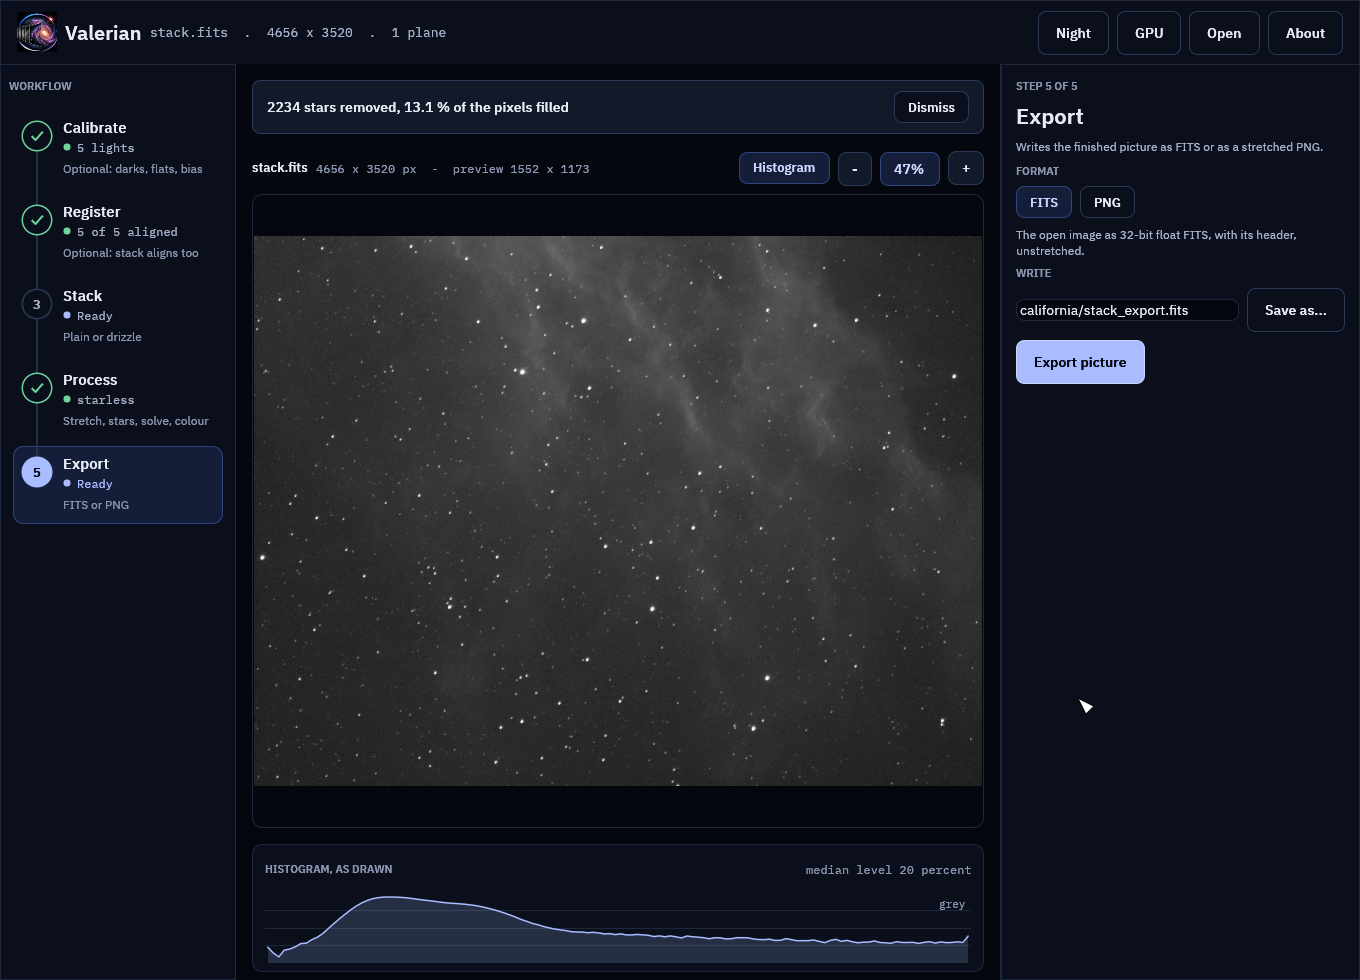
The pictures on this page are the real window, drawn by the program's own tests from real data: a monochrome H-alpha session of the California Nebula (five 300 s lights, with darks, flats and dark flats) and a one-shot-colour Seestar session of IC 5070 (sixty 10 s frames). A first session runs the same two sessions on the command line.
A whole session is walked through in the tutorial, and every control is in the desktop app reference.
The window
- Top bar: the logo and name (click either for the About page, or press Ctrl+F1), the file that is open, and the buttons Night (the red palette, F2), GPU (the benchmark), Open (Ctrl+O) and About. A Recent menu lists the images opened lately; with no image open the middle of the window lists them too, with the folder sets (sessions) you worked on lately.
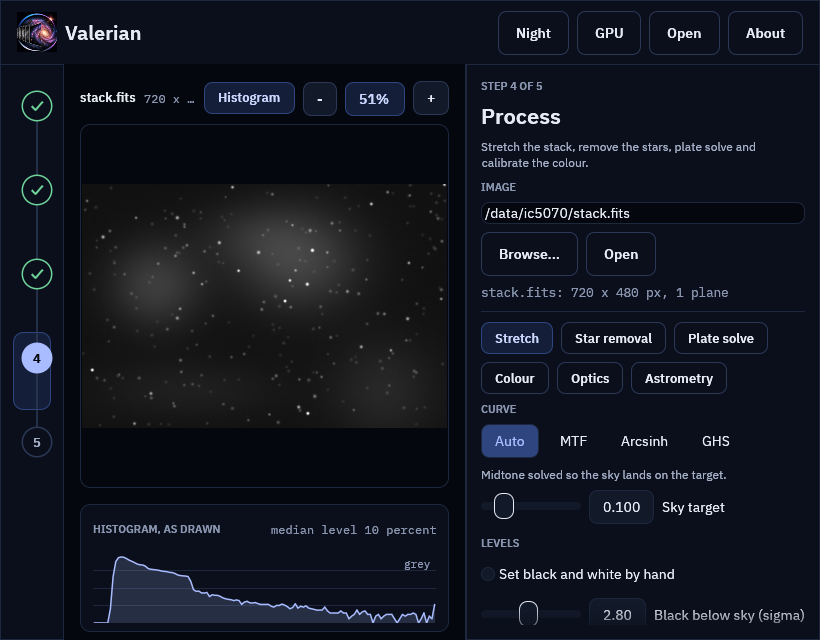
- Workflow rail (left): the five steps, numbered and joined by a line. Each shows where it stands (Optional, Ready, Running, or Done with a tick and what it produced) and a hint. Click a step to open its panel. Below 900 pixels wide the rail shrinks to the numbers.
- Panel (right): the open step's name, what it is for, and its controls. Drag its edge to resize it.
- Notice strip and view (middle): what is running or has just happened, then the picture with its zoom controls, then the histogram.
The five steps
1. Calibrate
Names a folder of lights and, optionally, folders of darks, flats, dark flats and bias
frames (or one master file in place of a folder), and a folder for the result. Calibrate
lights combines each kind of calibration frame into a master, builds the pixel map and
writes every calibrated light, with the masters in a masters folder inside, like valerian calibrate
(How calibration works). The viewer shows the first calibrated frame.
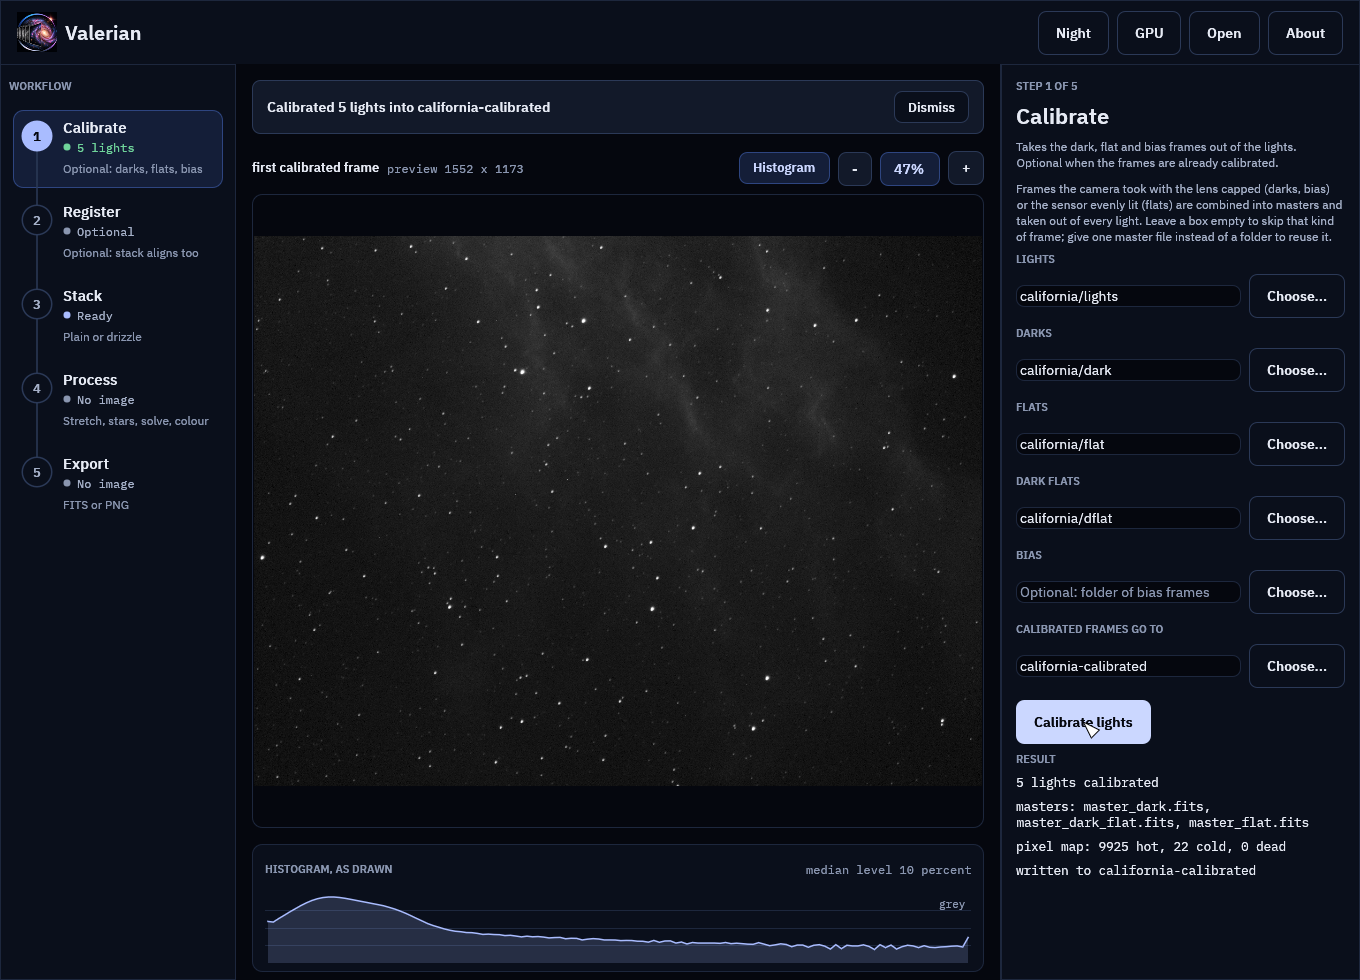
Leave the step alone when the frames are already calibrated, as a Seestar's are.
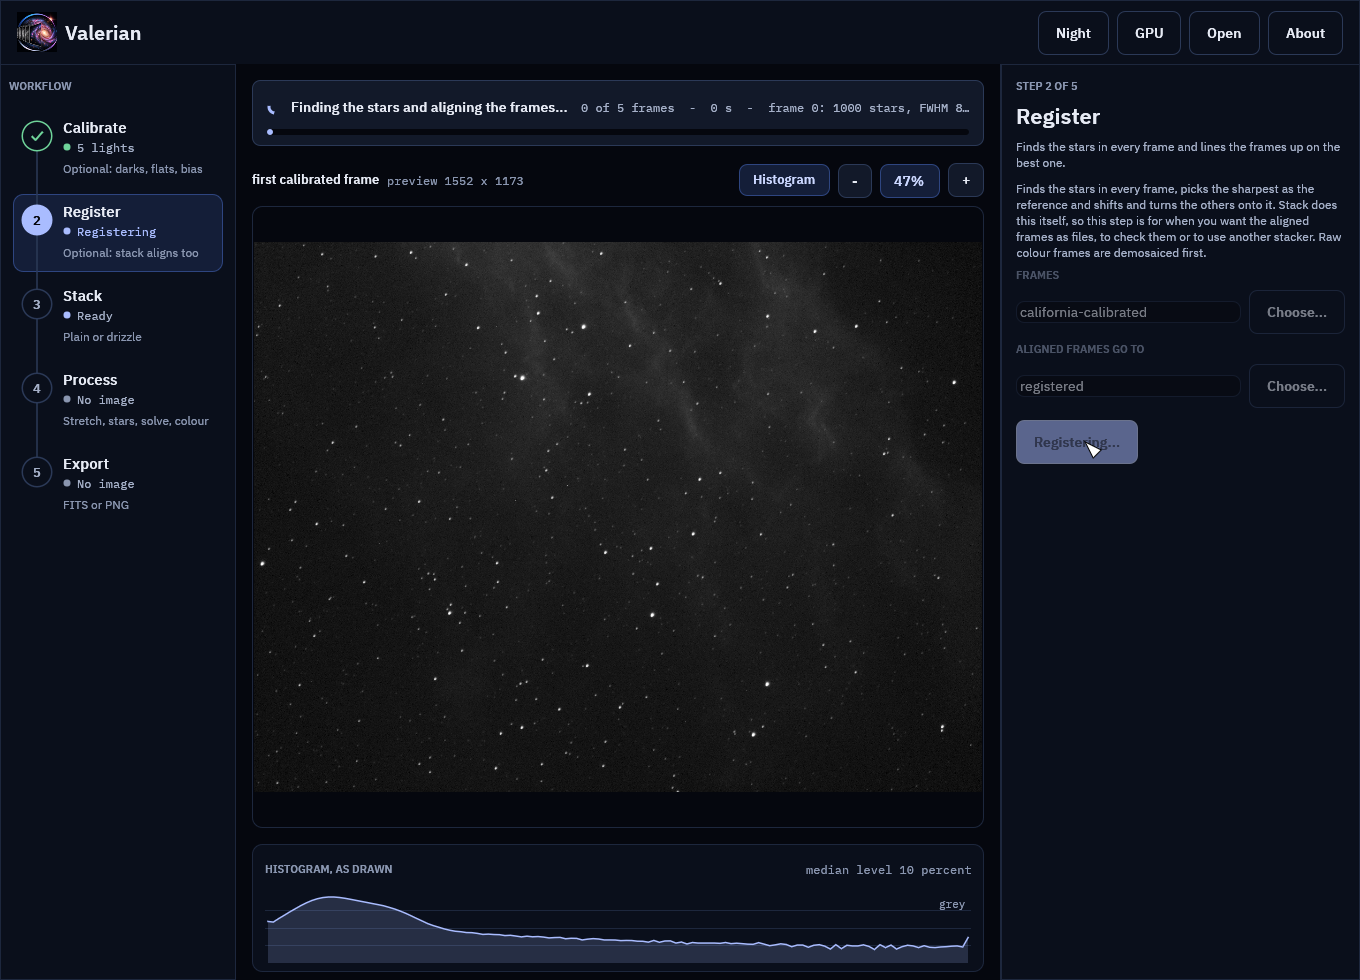
2. Register
Finds the stars in every frame, picks the sharpest as the reference and writes every frame
aligned to it, like valerian register (How registration works). Stack
registers by itself, so this step is for when you want the aligned frames as files, to check
them or to use another program. The folder defaults to the Calibrate output.
3. Stack
Registers and combines a folder of frames into one picture with outlier rejection, like
valerian stack (How stacking works). The folder defaults to the last step's
output; the rejection is automatic unless you choose one. Raw colour frames are demosaiced
first. The stack is written as a FITS file and opened for the Process step, so one
button takes you from sixty raw frames to a picture you can stretch.
The Drizzle chip in this step combines dithered frames onto a finer grid instead; see How drizzle works.
4. Process
Works on the open image, which is never changed: every tool edits its settings in the panel, previews on a reduced copy, and writes a new FITS file when you ask. The chips at the top of the panel choose the tool:
- Stretch: curves, levels and an automatic-stretch preview. See How stretching works.
- Star removal: remove the stars, look at the starless image, the stars and the mask, reduce instead of remove, and save both layers. See How star removal works.
- Plate solve: find where the image points from its header or a position you type, circle the matched stars, and save the world coordinates. See How plate solving works.
- Colour: calibrate the white balance against Gaia star colours, compare with the original, and save the result. See How colour calibration works.
To work on a file you already have, press Open (or Ctrl+O), type a path and press Open
in the panel, drop the file on the window, or start the program with the file name:
valerian-gui file.fits. The view is a reduced copy (1600 pixels on the long side); the
black and white points are measured on the full frame and the real work runs on the full
image when you apply.
5. Export
Writes the open image as 32-bit FITS, unstretched and with its header, or as an 8-bit PNG
drawn with the stretch chosen in Process, for sharing. The name defaults to
<name>_export.fits beside the image, and the extension follows the format.
The view
The picture is first drawn from a reduced copy (1600 pixels on its long side), which is what lets a slider move the stretch at once. Its zoom is in screen pixels per pixel of the open image (100 % is one screen pixel to an image pixel), and once the zoom needs more detail than the reduced copy holds, the viewer draws the real pixels from an image pyramid it builds in the background (the zoom tutorial explains how).
- Scroll over the picture to zoom about the pointer, or press + and -; press 1 for exactly 1:1.
- Drag to pan. A double click, or the percentage button, fits the picture to the window again.
- A box at the bottom left of the picture gives the pixel under the pointer: its image coordinates, the raw value of each plane, the stretched value and, for a plate-solved image, RA and Dec.
- The histogram under the picture is of what is drawn, per colour (grey for a mono picture), on a log scale, with the median level at the right. The Histogram button hides it.
Plate solving and colour calibration draw circles on the stars they matched or used; they follow the zoom.
Notices
Whatever is running is announced above the picture: a spinner, what is being done, how many frames of how many it has done (with a bar), the seconds it has taken and the latest line the step reported (the frame being registered, its stars and its seeing). The window stays usable while it works. A finished step says what it did and has a Dismiss button; an error stays until you dismiss it. A running step has a Cancel button in the notice (Esc does the same): it stops within a frame, band or plane, keeps nothing and leaves the output folder as it was. See Cancelling a running step.
Night vision
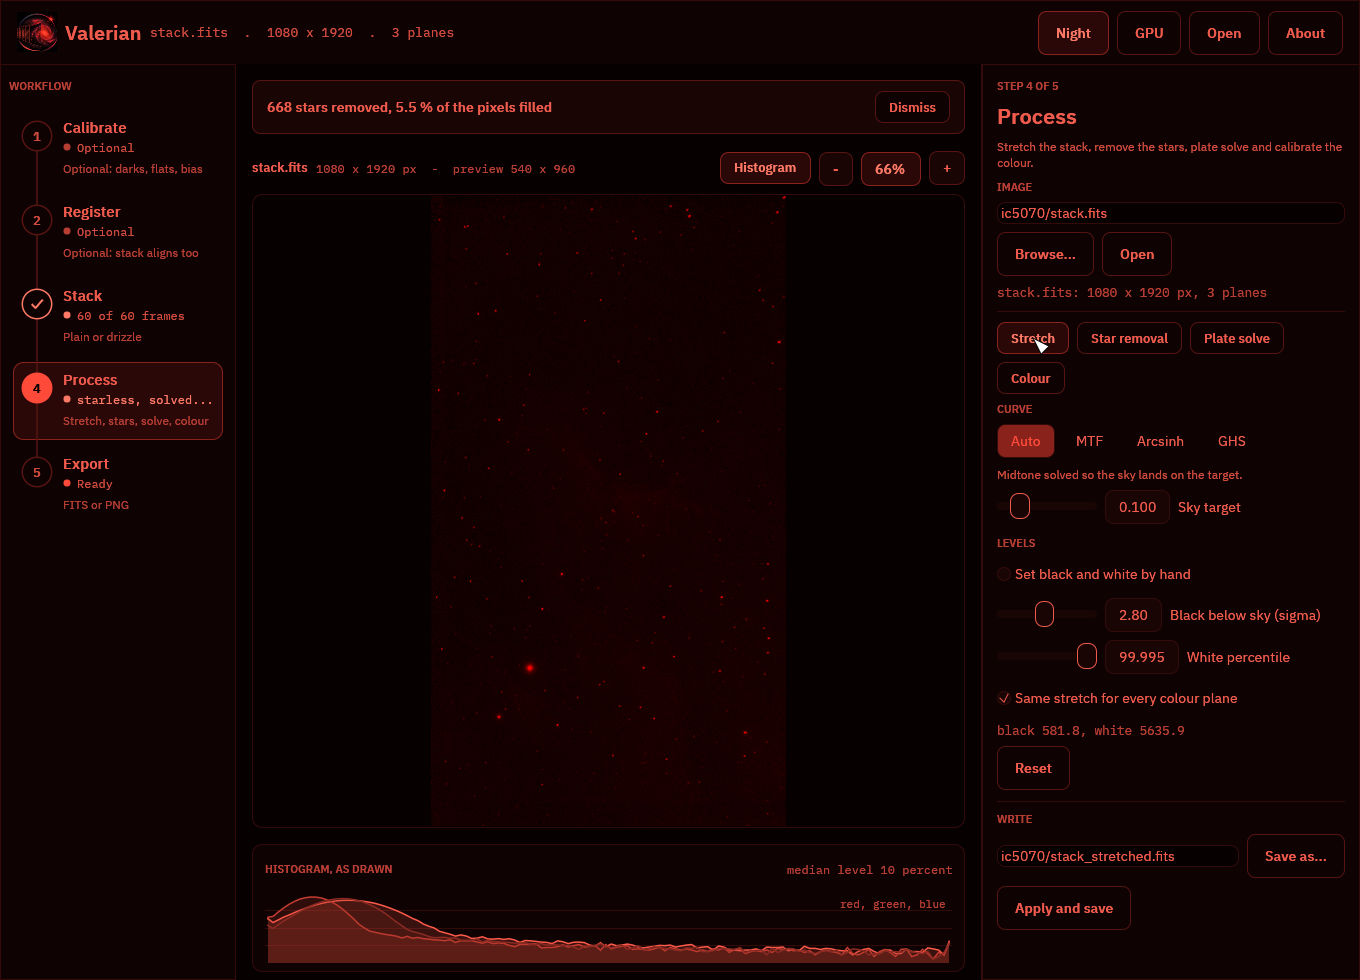
Night (or F2) swaps every colour for red on black, and draws the picture and the logo in red only, which keeps dark-adapted eyes dark-adapted. The choice is remembered.
Sorting a folder of frames
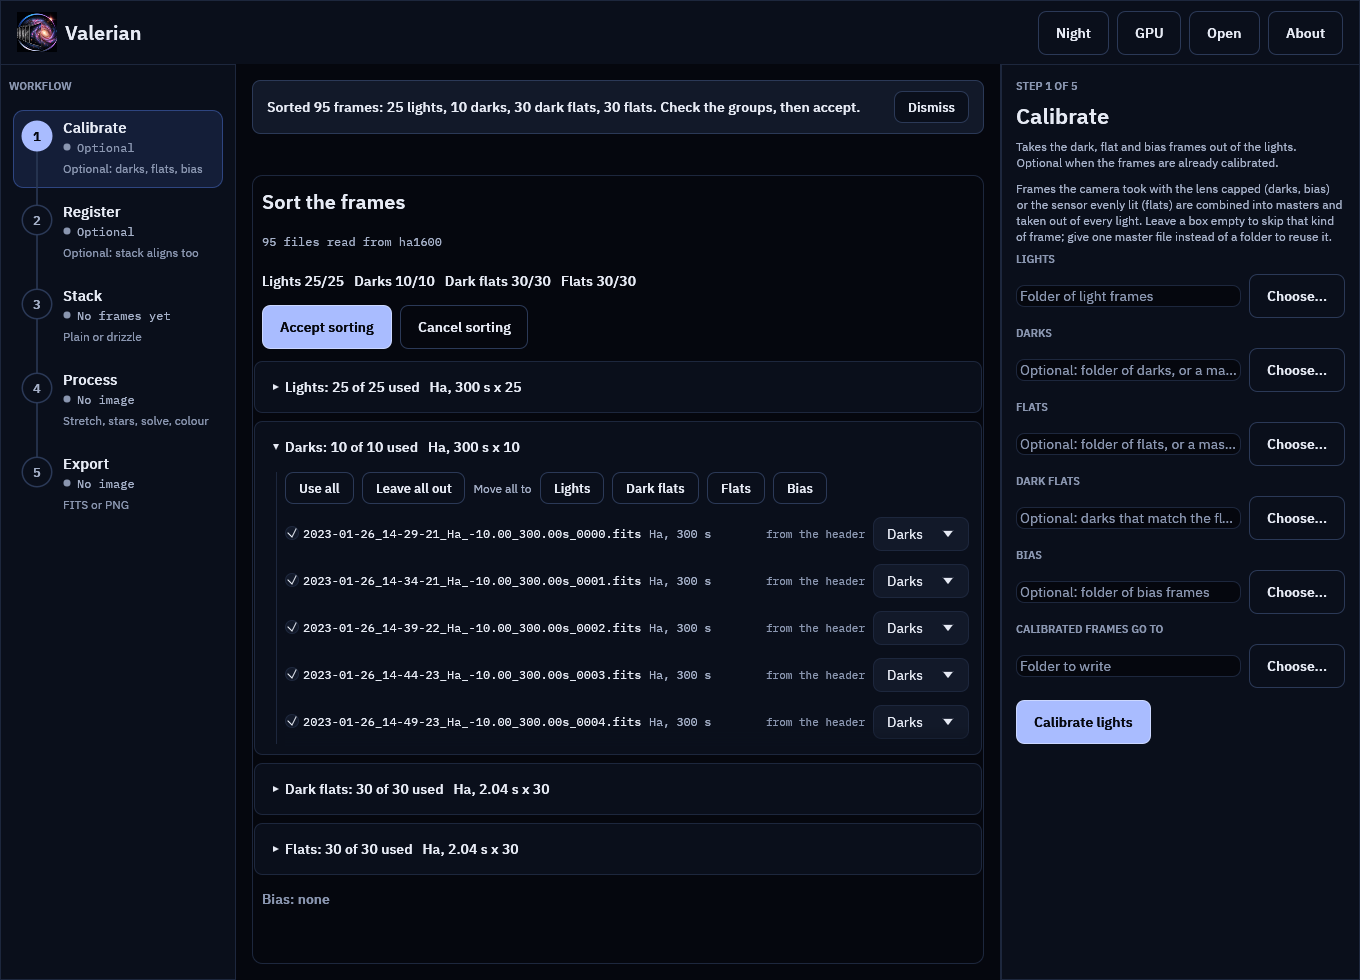
Drop a folder on the window (or press Ctrl+Shift+O). Valerian reads the headers of the FITS files
in it, sorts them into lights, darks, dark flats, flats and bias by IMAGETYP (then by file
and folder name), and shows a review where you can move frames between groups or leave them out.
Accept sorting fills the Calibrate, Register and Stack boxes. The session is then listed on
the start screen, so another night it is one click to get back to. See
the tutorial and the
reference.
Choosing files
Every place the app reads or writes a file has a native file dialog, the operating system's own (the common dialog on Windows, the desktop portal on Linux), so the usual places, recent folders and bookmarks are there:
- Open in the top bar (or Ctrl+O) opens an image. It starts in the folder of the image already named and shows FITS files.
- Choose... beside each folder box of Calibrate, Register and Stack picks a folder, and
Save as... beside each output path (Stack, Stretch, Star removal, Plate solve,
Colour, Drizzle and Export) chooses where the result is written. It offers the name the box
holds, starts in its folder and adds
.fitswhen the name has no extension. Cancelling the dialog leaves the box as it was. - Choose catalogue... in the Plate solve panel picks a
.vcatstar catalogue. - Choose folder... in the Drizzle panel picks the folder of frames to drizzle.
The path boxes still work for typing or pasting a path, and the dialog runs beside the window, which stays responsive while it is open.
Shortcuts
F1 or ? lists them in the window. The main ones:
| Key | Does |
|---|---|
| Ctrl+O | Open an image |
| Ctrl+Shift+O | Choose a folder of frames to sort |
| Ctrl+Enter, F5 | Run the open step |
| Esc | Cancel the running step |
| Alt+Right, Alt+Left | Next and previous step |
| + - 0 1 | Zoom in, out, fit, 100 percent |
| F2, N | Night vision on or off |
| F1, ? | The shortcut list (Esc closes it) |
| Ctrl+F1 | The About page |
Every key says what it did in the notice above the picture. The full table is in the reference and the tutorial walks through it.
The GPU and the About page
GPU in the top bar opens a graphics adapter, times the calibration, warp and combine kernels against the CPU code on frames of a size you choose, and shows how well they agree. See The GPU kernels. Any step on the rail leaves it.
About (the logo or the name, or Ctrl+F1; Esc closes) leads with the dedication, then the version and build record (with a button that copies them for a bug report, and one that opens the GPU adapter and adds it), the copyright, the licence, the additional terms, a link to 12hobbies.studio under "More from Laurence Horrocks-Barlow", and the third-party licences when the list ships beside the program.
valerian-gui -V prints the name and version and valerian-gui --version adds the notices,
both without opening a window.
Background extraction (valerian background) is on the command line and is
not in the window yet. The screenshots in this manual are made by the GUI tests (see
the source repository).